
I’ve been mining Bitcoin and crypto for nearly a decade, and one thing I’ve learned is that getting started is way simpler than most people think. You don’t need an expensive gaming PC, and you definitely don’t need to be a computer expert. In this guide, I’ll walk you through everything you need to start mining Bitcoin at home, step by step.
In this Bitcoin mining for beginners guide, you’ll learn:
- What a Bitcoin mining machine actually is and how it’s different from a normal computer
- How to unbox and assemble your first miner
- How to get your first Bitcoin wallet address (two ways)
- The difference between solo mining and pool mining
- How to connect your miner to the Bitcoin network
- What kind of rewards you can realistically expect
Table of Contents
- What You Need Before You Start
- What Is a Bitcoin Mining Machine?
- Step 1: Unbox and Assemble Your Miner
- Step 2: Get Your First Bitcoin Wallet Address
- Step 3: Solo Mining vs. Pool Mining
- Step 4: Connect Your Miner to the Bitcoin Network
- Watch the Full Video Guide
- Frequently Asked Questions
- More Bitcoin Mining Guides
What You Need Before You Start
There are only two real prerequisites to mine Bitcoin at home, and if you’re reading this, you probably already have both. First, you need electricity and power. Second, you need access to the internet. That’s it. Everything else, we’re going to walk through together.
Beyond those two things, you’ll need three items that I’ll cover in detail below: a Bitcoin mining machine, a Bitcoin wallet address, and a mining pool (or solo pool) to connect to the network. Let’s start with the hardware.
What Is a Bitcoin Mining Machine?
Your regular computer is a jack of all trades. It can browse the internet, send emails, and create files. A Bitcoin mining machine does one task only, and that’s mine Bitcoin.
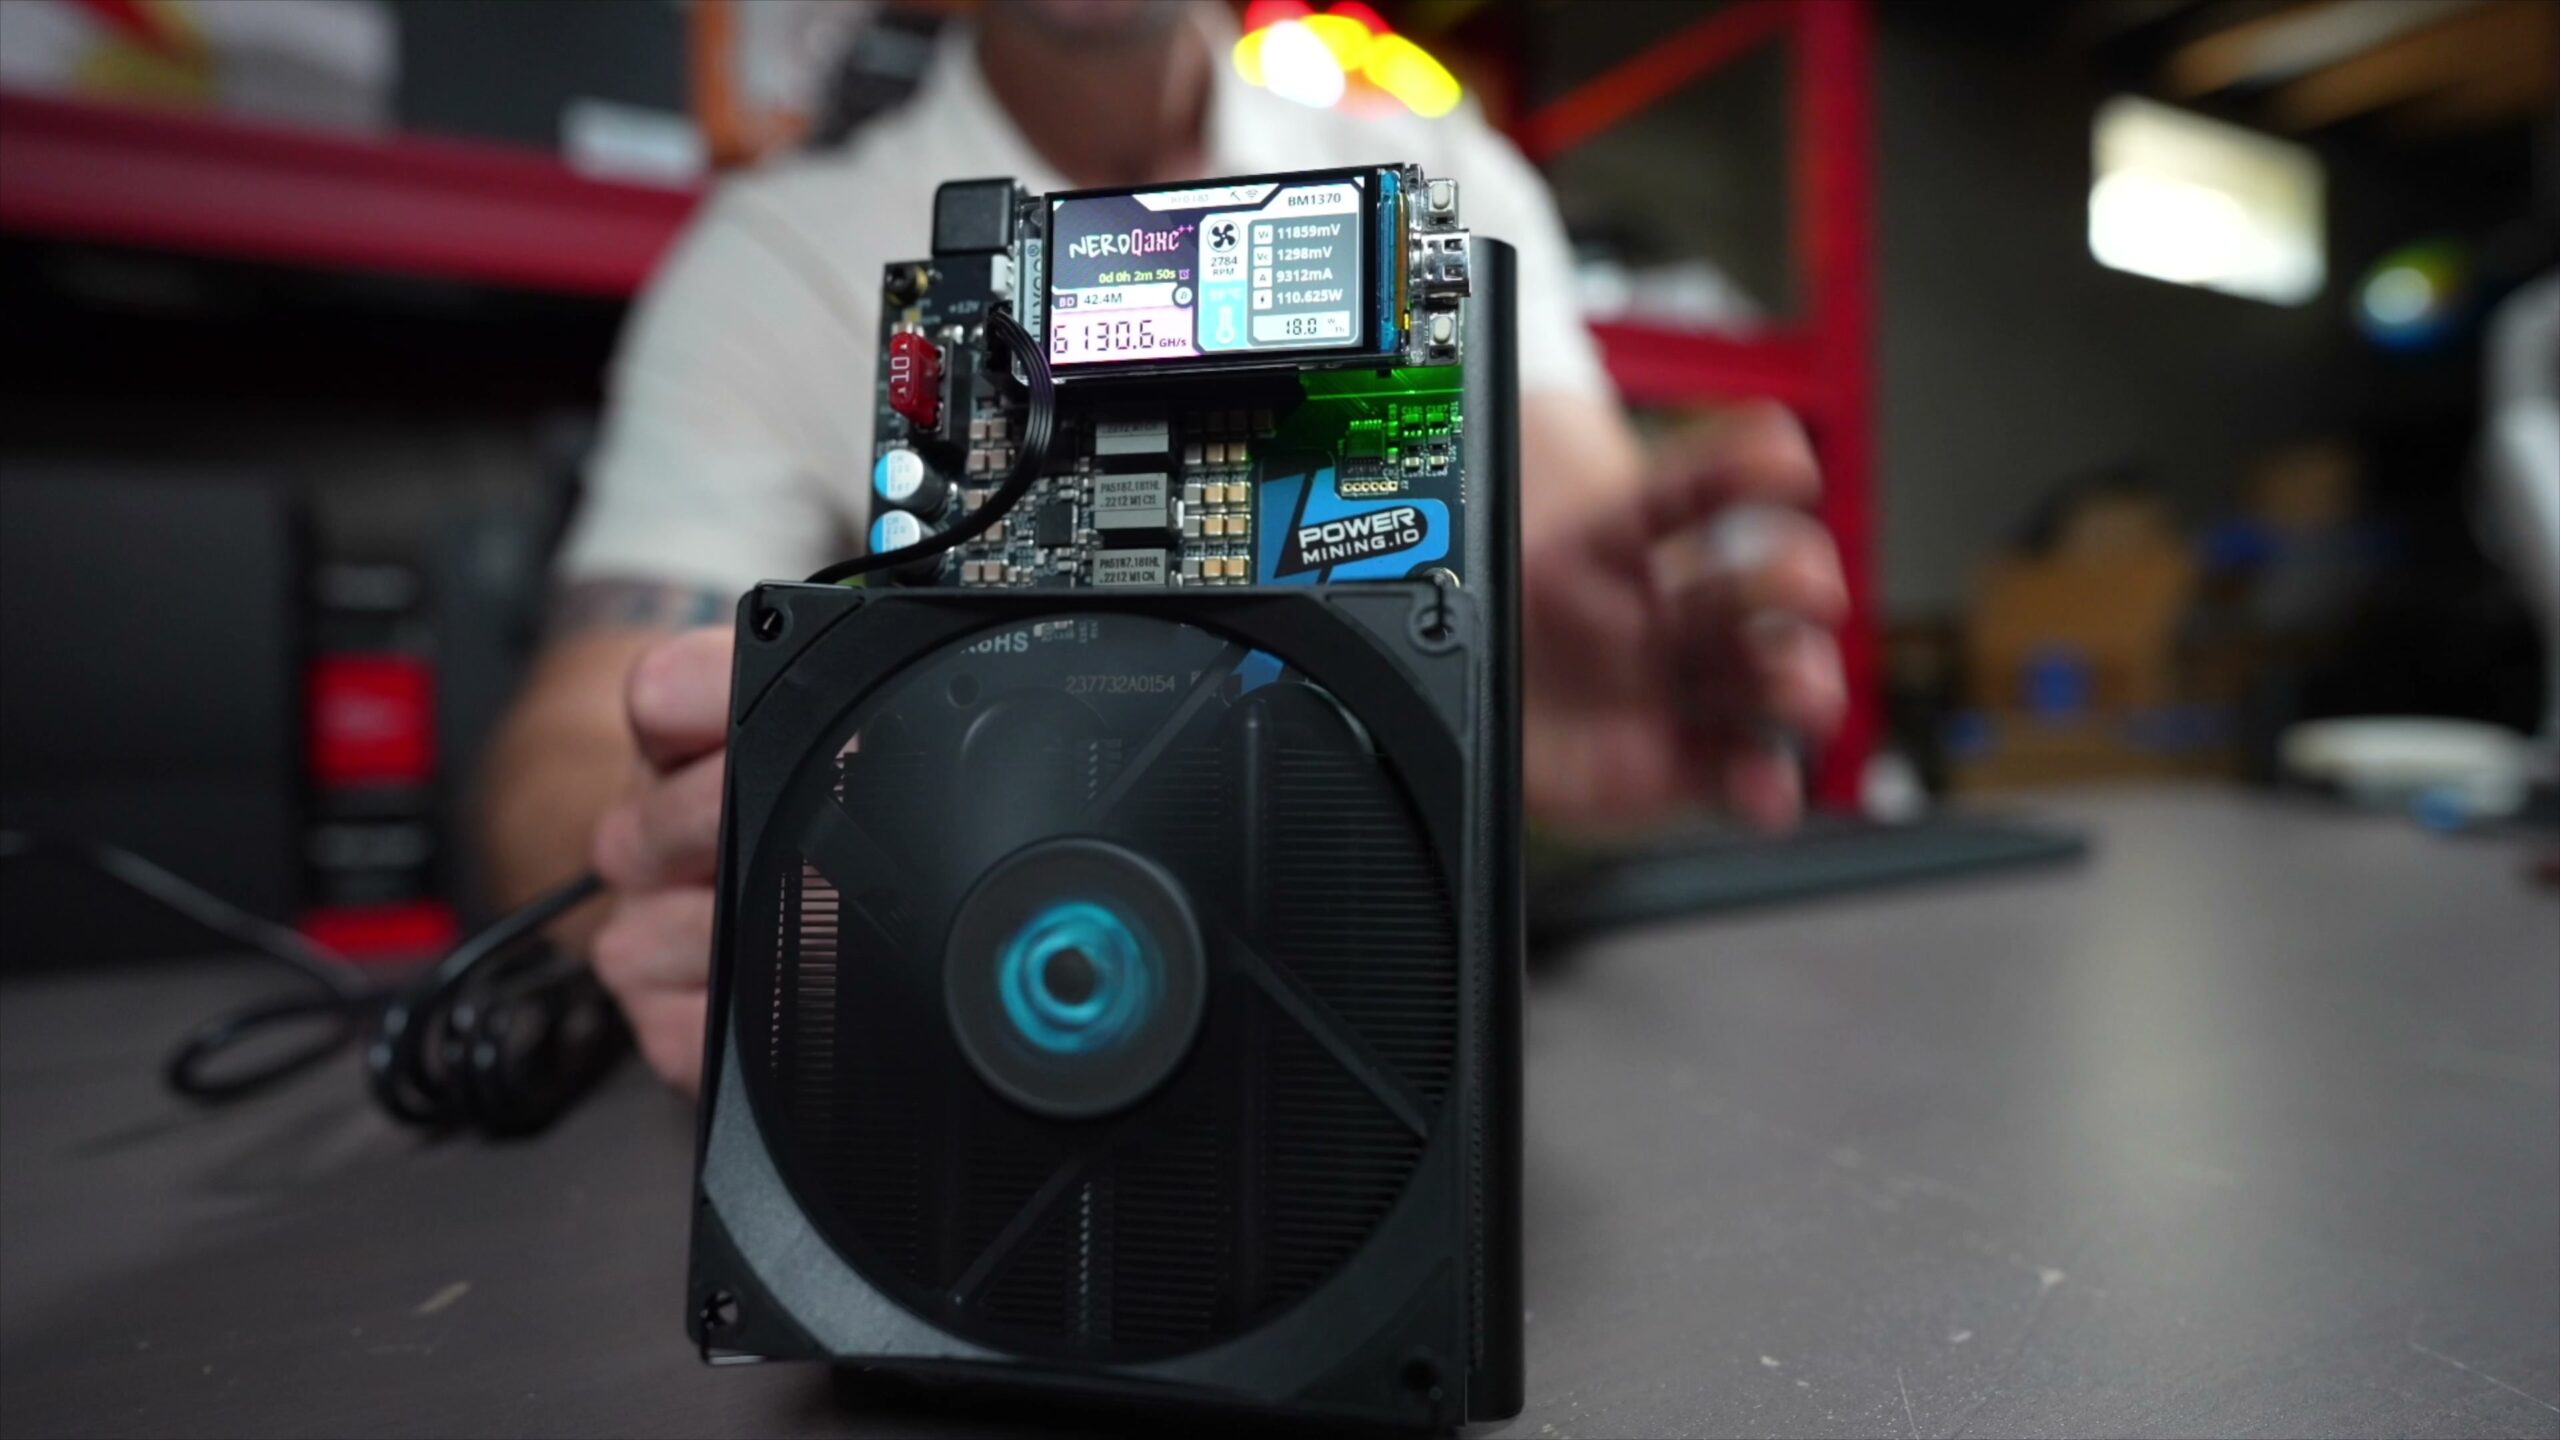
Underneath the fan and heat sink of a miner is a computer chip that can only do that one job. It cannot browse the web or create files. But because it’s purpose-built, it mines Bitcoin far better than any general-purpose computer chip ever could. That’s what makes these machines so special.
The Anatomy of a Home Miner
The miner I’m using in this guide is a NerdQAxe++. Don’t let the fancy name scare you off. When you break it down, it’s just a small computer built for one purpose. Here’s what’s inside:
- The mining chip — the purpose-built chip that hashes and mines Bitcoin
- Heat sink and fan — keeps that chip cool, just like a regular computer
- A display — so you can see what’s happening at a glance
- A Wi-Fi chip — to get you connected to the internet
- A power supply — plugs into your house outlet and connects right to the miner
Where to Buy: If you want to pick up a NerdQAxe++ or a similar home miner to follow along with this guide, you can check current availability. Grabbing one through my links helps support me, my family, and the channel, and I very much appreciate it.
Step 1: Unbox and Assemble Your Miner
When you open the box, you’ll find the miner itself (the computer-looking part), a big piece of metal that acts as a stand, some screws, an extra fuse, and the power supply. Assembly is genuinely simple.
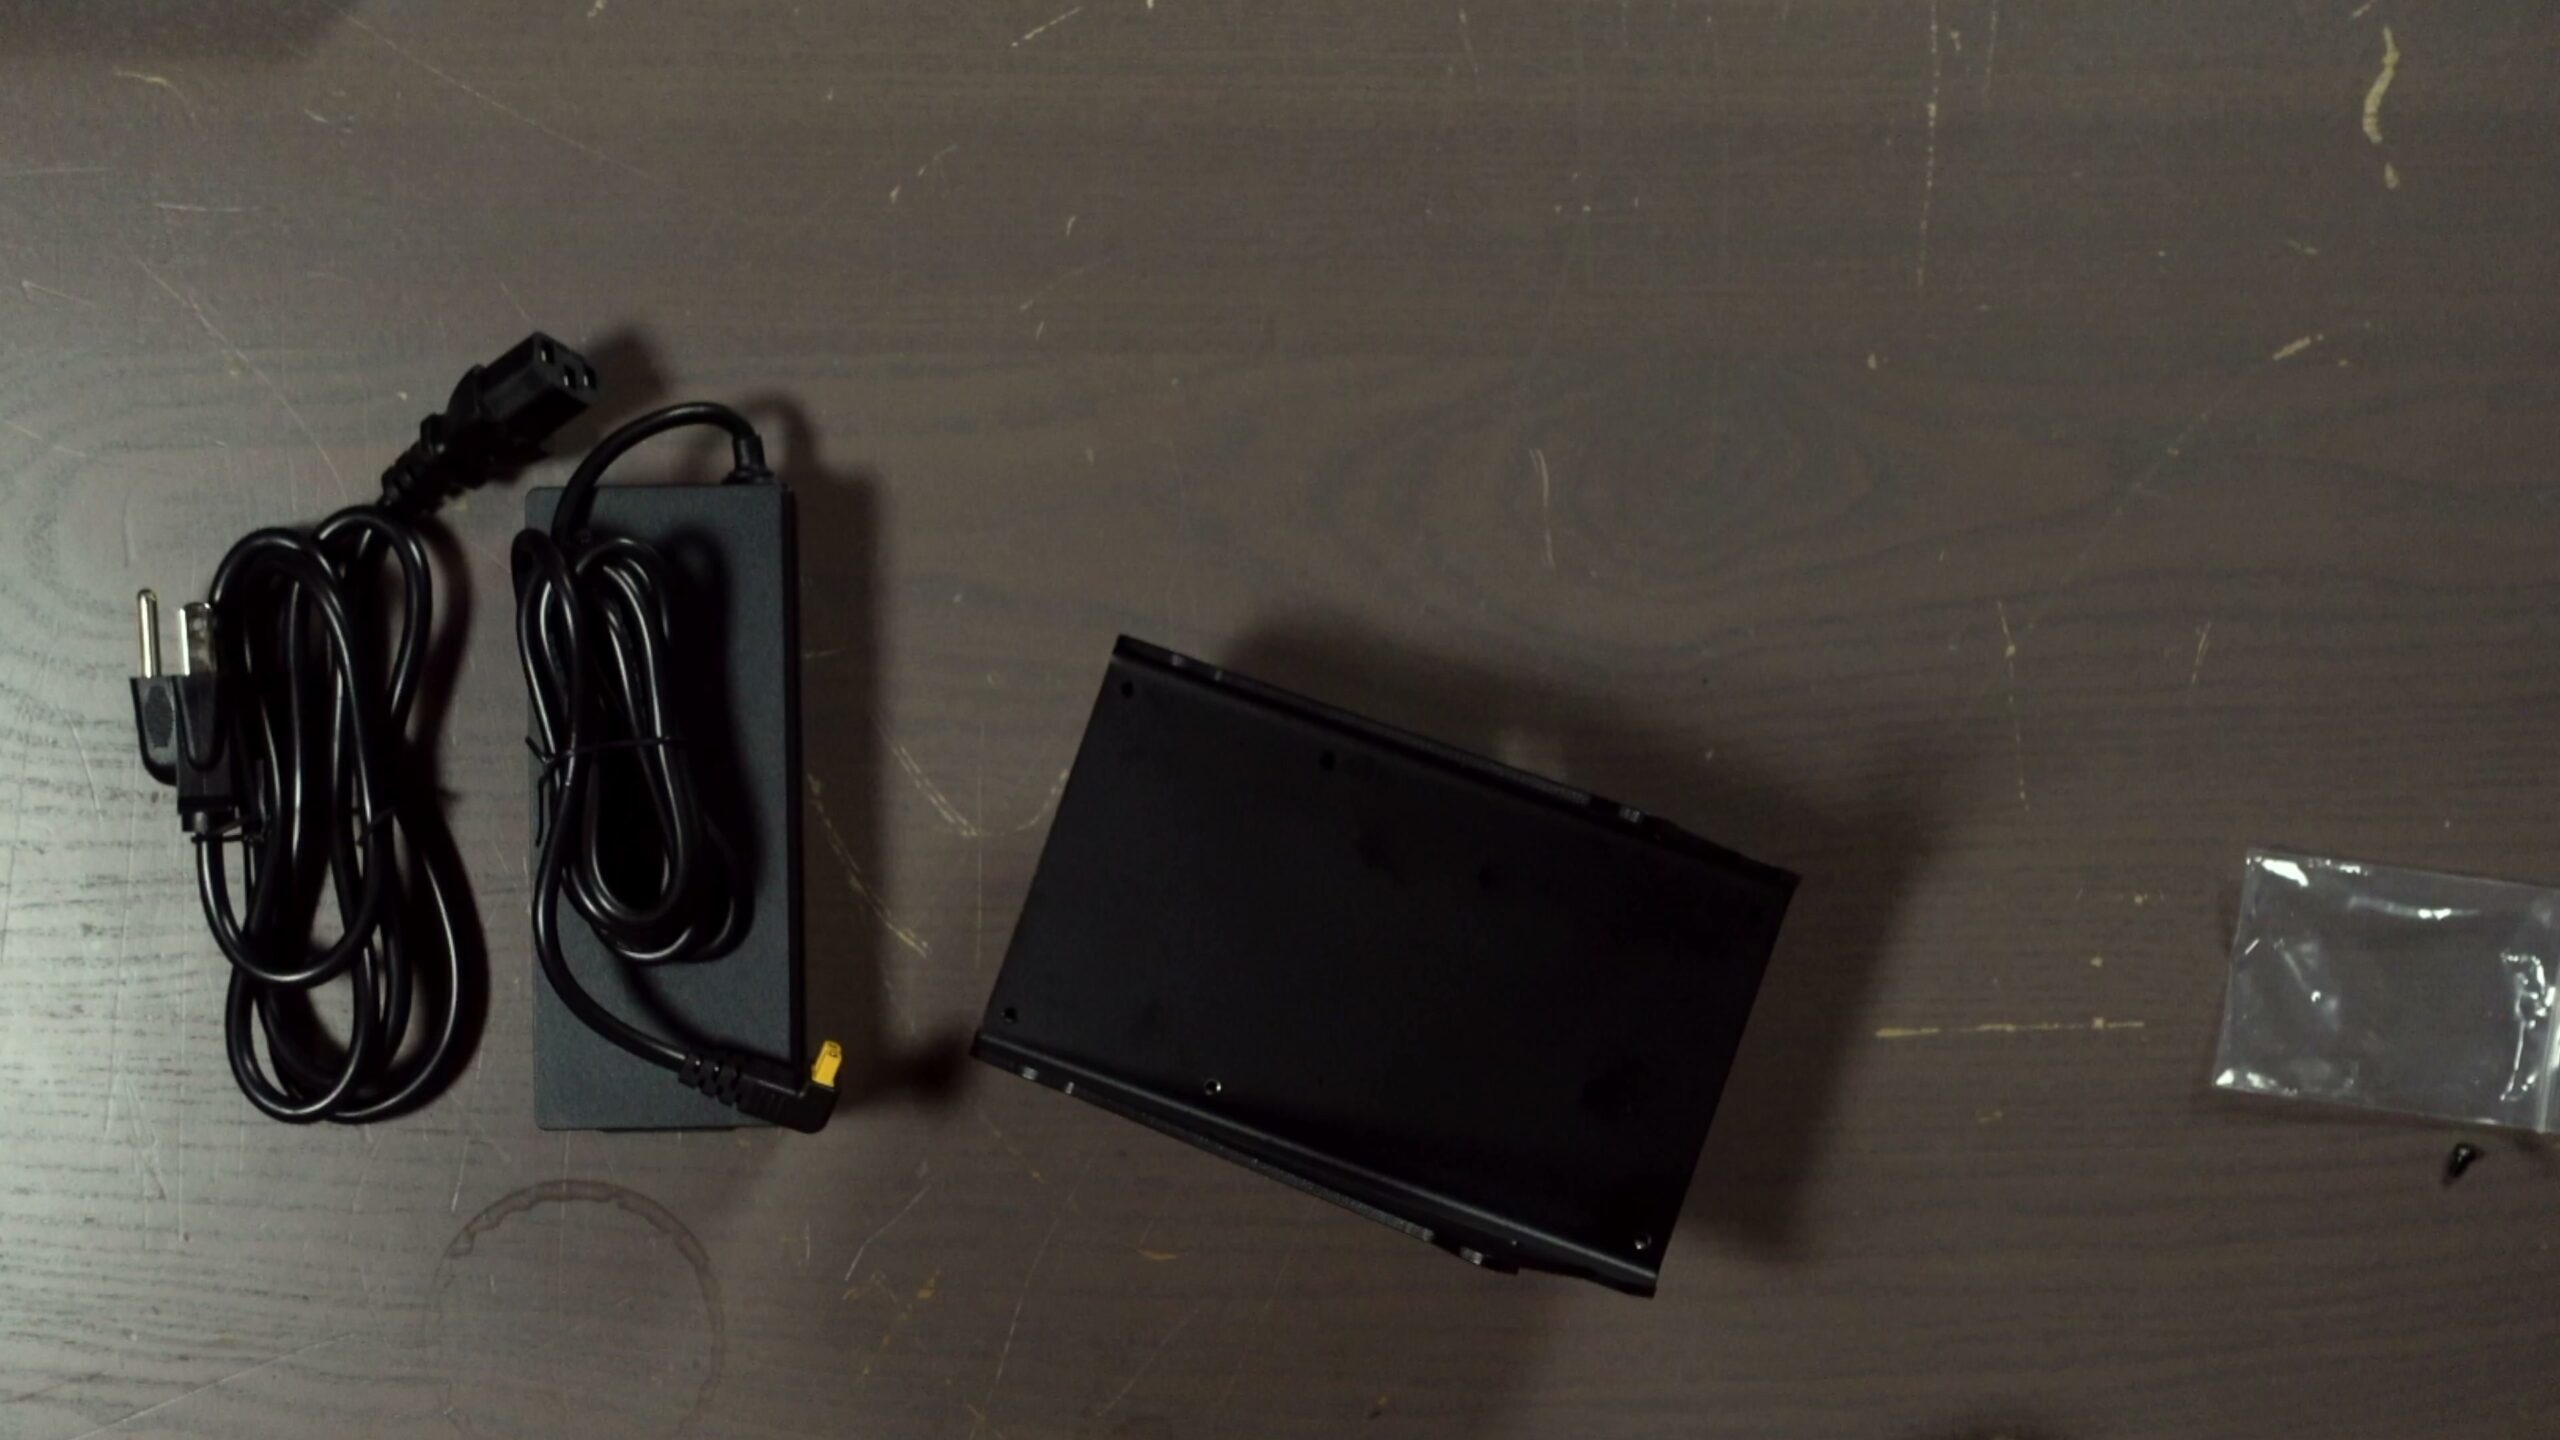
- Take your Bitcoin mining machine and attach it to the stand.
- Screw through the back of the stand using the supplied Allen key.
- That’s it — less than a minute later, it’s fully assembled.
Once it’s put together, plug the power supply into your wall outlet and connect it to the top of the miner. You’ll hear the fan kick on as it powers up. While it boots, let’s get your wallet address ready.
Step 2: Get Your First Bitcoin Wallet Address
When you mine Bitcoin, you need somewhere for it to be paid out — and that’s a Bitcoin wallet address. There are two ways to get one, and I’ll show you both so you can pick the option that fits where you are on your Bitcoin journey.
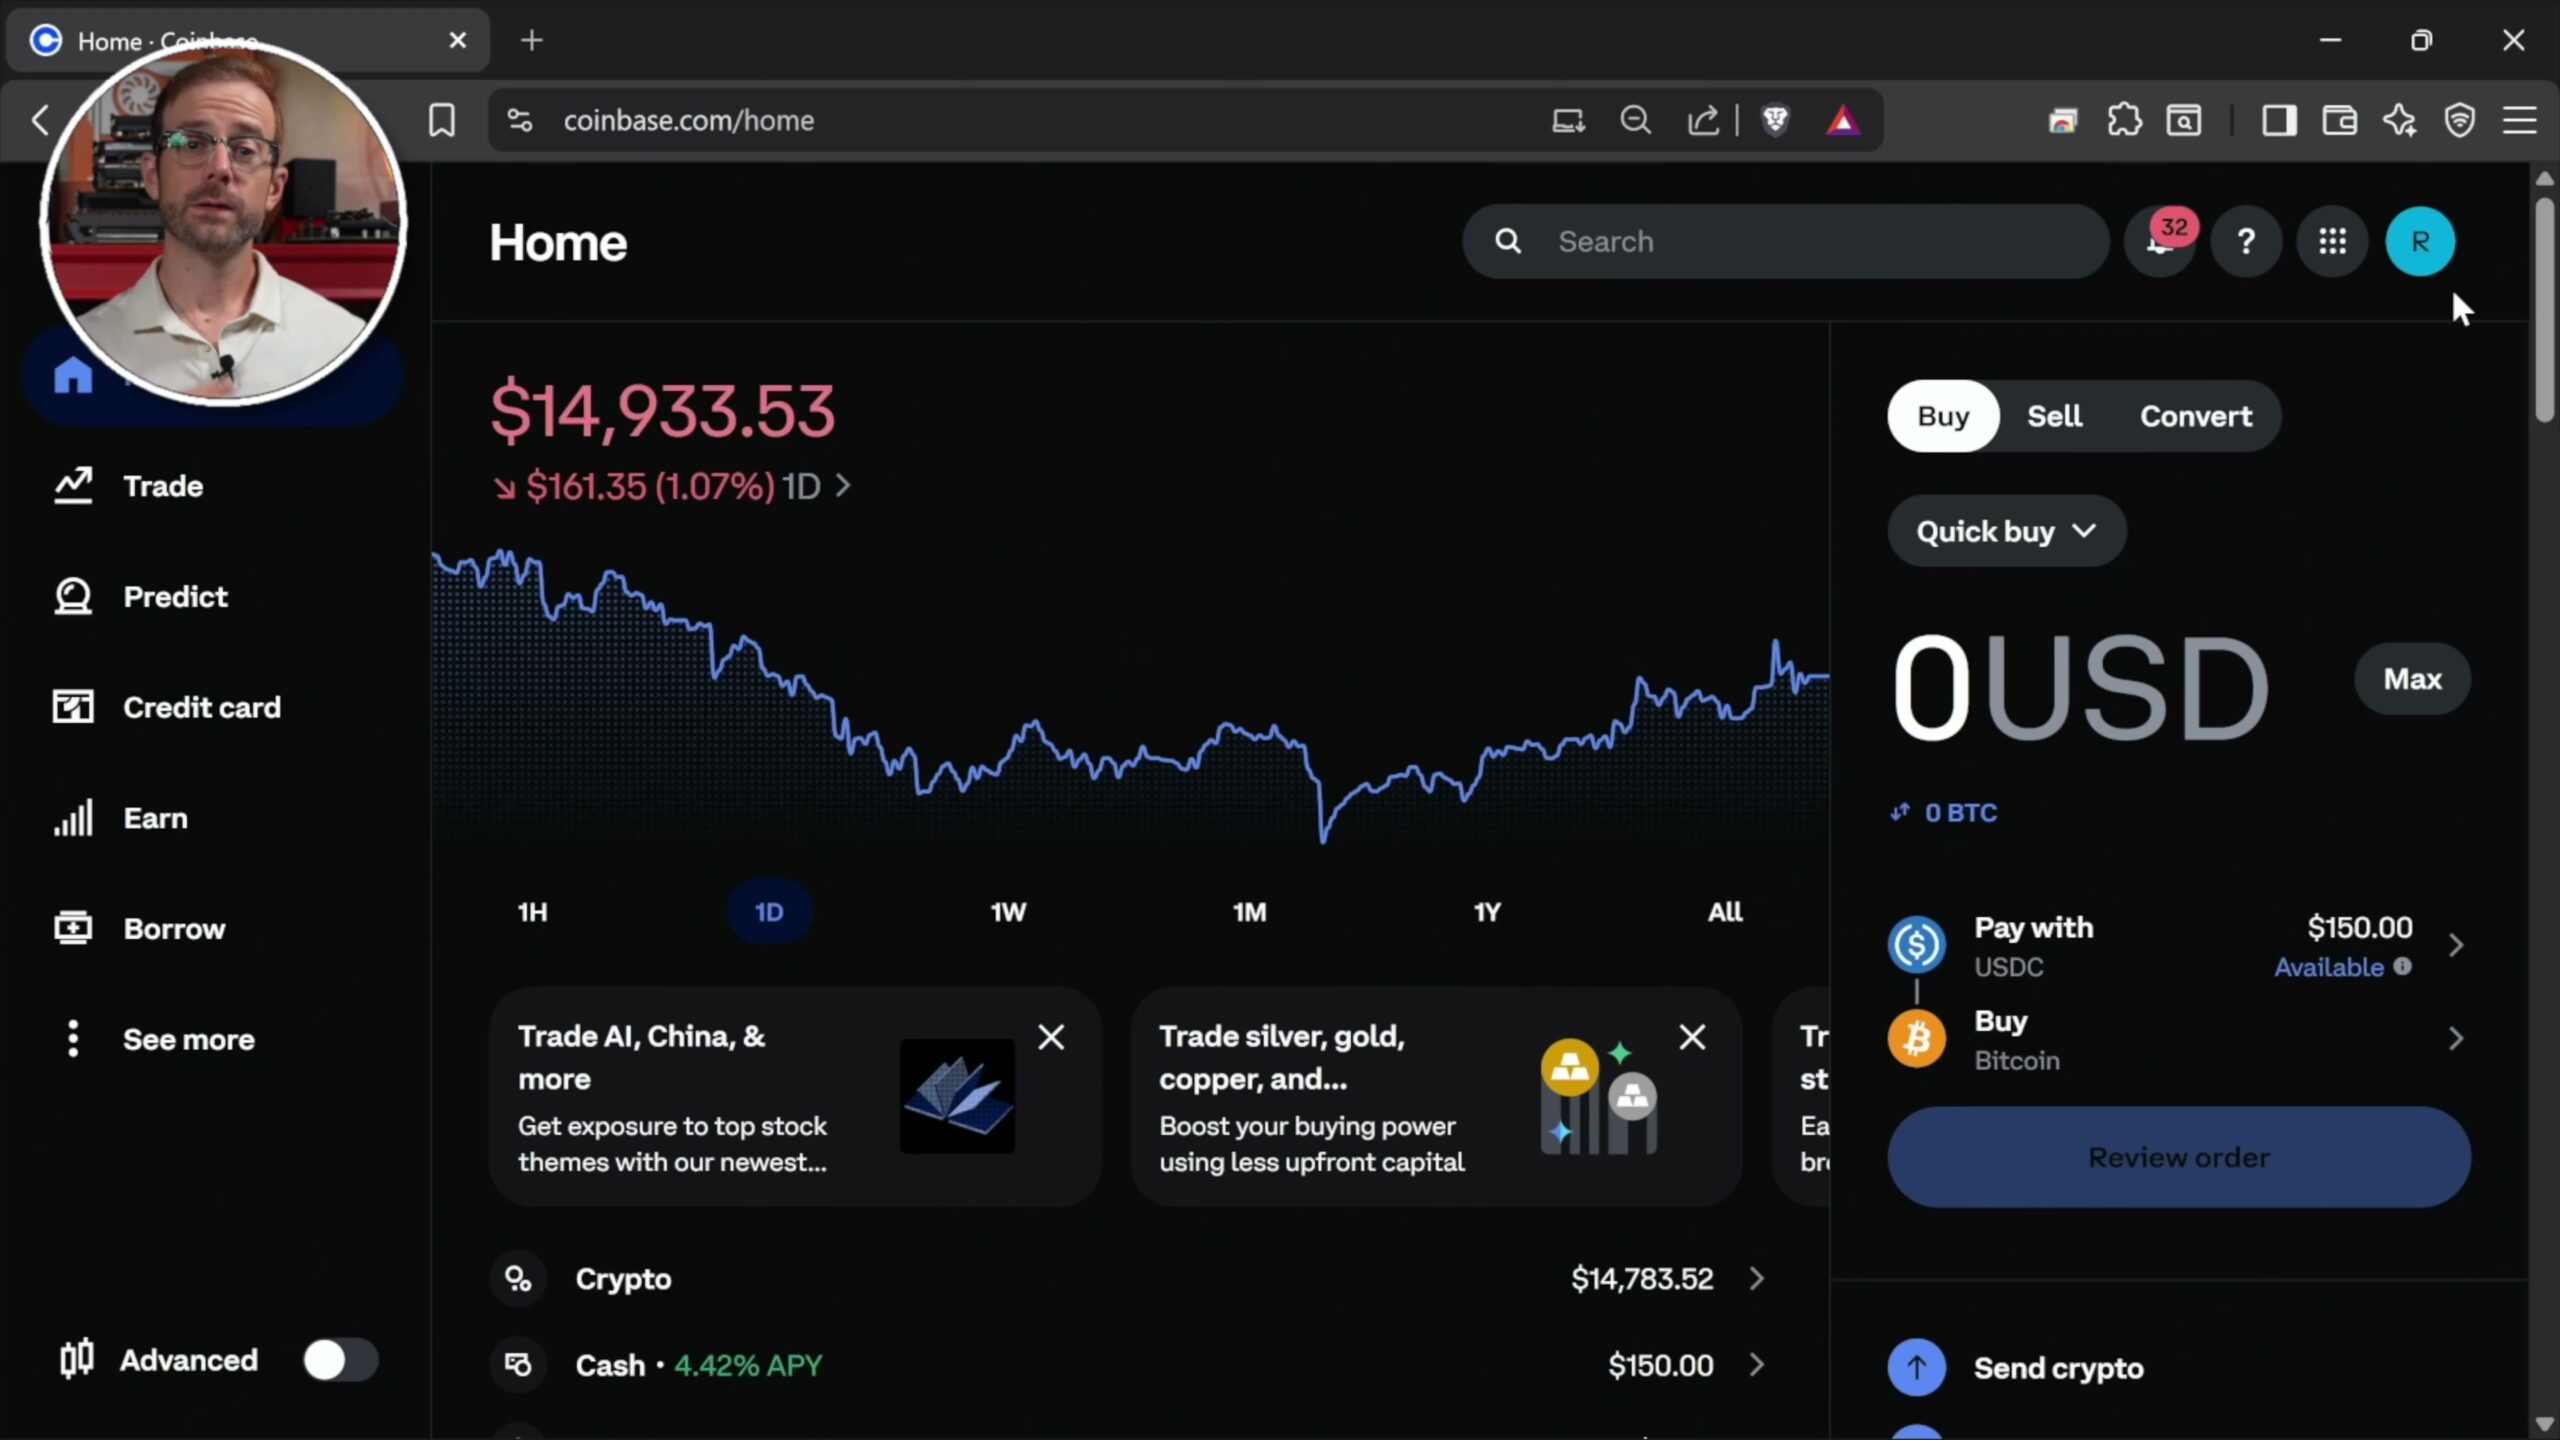
Option 1: Coinbase (Best for Beginners)
If you’re just getting started, I recommend signing up for an account on Coinbase.com. It’s an exchange I’ve used for all my time in cryptocurrency. It lets you turn your dollars into crypto and turn crypto back into dollars to send to your bank. For our purposes, though, we just need it to generate a Bitcoin address.
- Sign up for a Coinbase account.
- Once you’re in, scroll down to Receive Crypto.
- Choose Bitcoin.
- Choose the Bitcoin network.
- Copy your Bitcoin address and hang on to it — we’ll need it soon.
Option 2: A Hardware Wallet (Best for the Long Haul)
Coinbase is great and I use it, but at the end of the day, I’m trusting them with my Bitcoin. They hold the key that’s needed to move my Bitcoin around the blockchain. If you plan to stick around Bitcoin for a while and accumulate a good amount, you should hold that key yourself. That’s called a hardware wallet, or cold storage.
One of my favorites is the Tangem wallet. Inside the box are three NFC cards that are redundant copies of each other, so if one goes missing or stops working, you have a backup. To grab a receiving address on a Tangem, you authenticate (with biometrics and by scanning the card), then tap on Bitcoin, tap Receive, and there’s your Bitcoin address.
Whether you use Coinbase or a hardware wallet, the outcome is the same: you get a Bitcoin address that your mining rewards will be paid to. Keep it handy for the next step.
Step 3: Solo Mining vs. Pool Mining
Before we connect the miner, you need to make one decision: solo mining or pool mining. Let me explain it with a lottery analogy, because it makes this really easy to understand.
Say you buy a lottery ticket. You have a chance of winning the whole jackpot for yourself — but that chance is extremely small. That’s solo mining.
Now imagine you go around town and pool your lottery ticket with everyone else who bought one. If any ticket in the pool wins, you all split the jackpot. Your odds of winning something go way up, but the reward you get is smaller. And if Joe down the street contributed five tickets to your one, it makes sense for him to get a bigger share. That’s pool mining, and your share is based on how much hashing power you contribute.
Putting Real Numbers to It
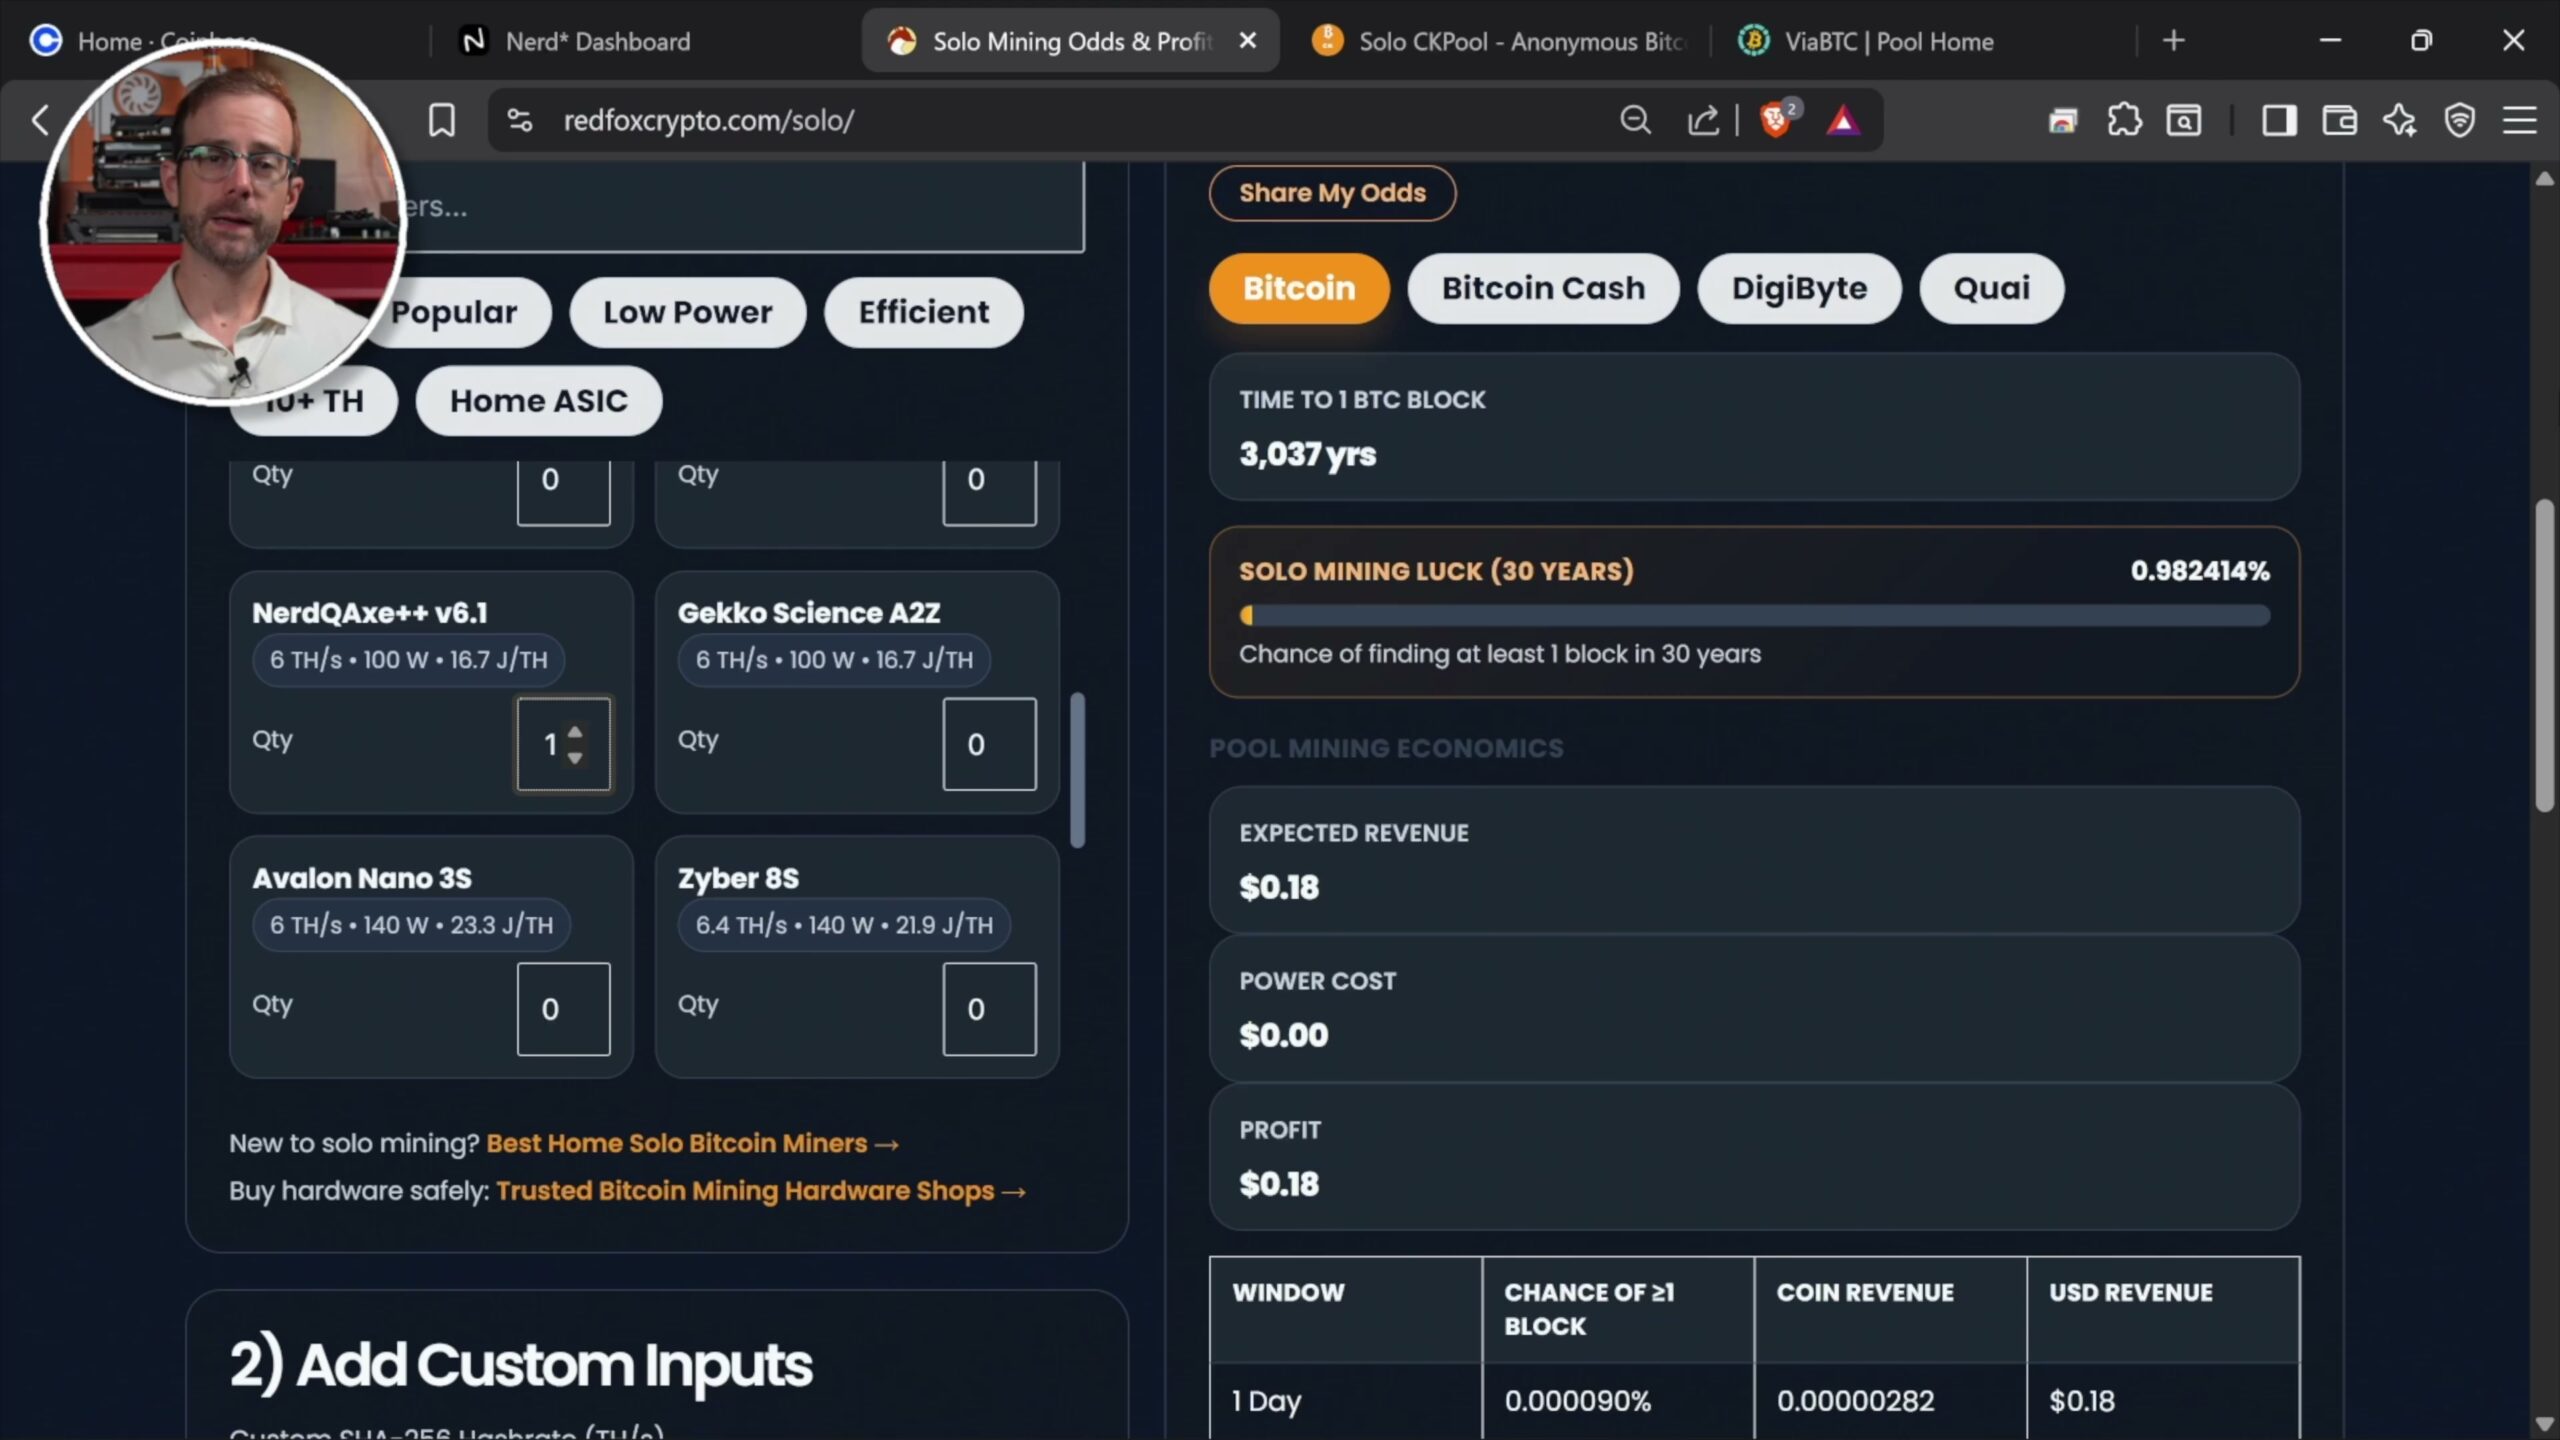
Let’s use the NerdQAxe++ as an example. With Bitcoin where it’s at, the Bitcoin “jackpot” (block reward) is worth about $200,000. Here’s how the two options compare for this machine:
| Mining Style | What You’re Chasing | Expected Result |
|---|---|---|
| Solo Mining | The full ~$200,000 block reward | ~3,037 years average to hit it; ~0.032904% chance in a given year |
| Pool Mining | A small, consistent share of the pool’s rewards | Around 18 cents in Bitcoin per day |
So the choice comes down to this: do you want to chase the big $200,000 payday that may never happen in your lifetime — or could happen tomorrow — or do you want small but consistent rewards of around 18 cents in Bitcoin per day? Neither is wrong. It’s about what fits your goals. I’ll show you how to set up both.
Step 4: Connect Your Miner to the Bitcoin Network
As your miner reboots, look at the top of its screen. You’ll see an IP address it grabbed from joining your network — mine was 10.0.1.83. Type that IP address into a browser on your computer (or your phone), hit enter, and you’ll land on the miner’s dashboard.
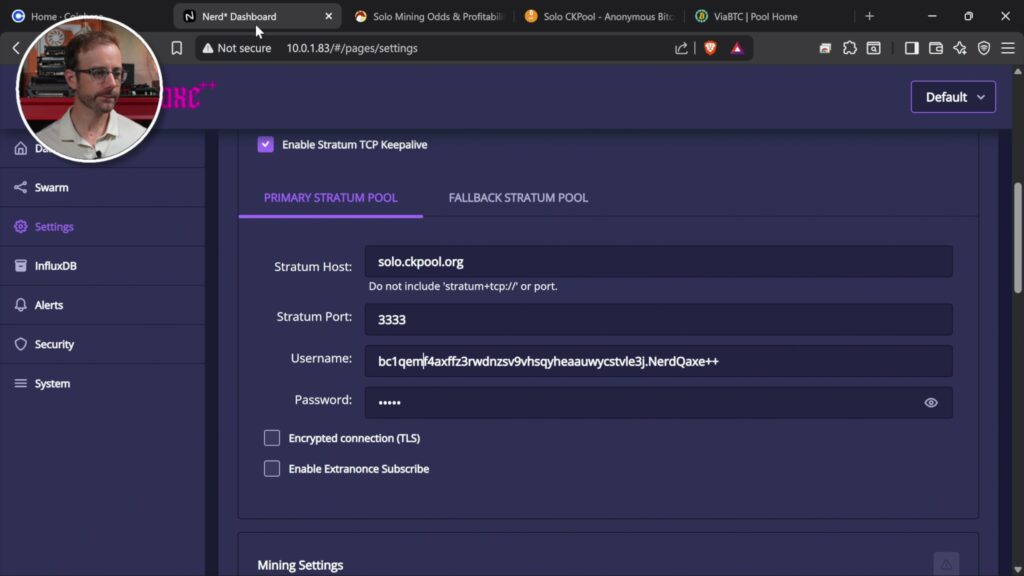
From the dashboard, go to Settings, and scroll down to the Primary Stratum Pool section. This is where we tell the miner what to connect to. What you enter here depends on whether you chose solo or pool mining.
Setting Up Solo Mining
If you want to go for the jackpot, use solo.ckpool.org.
- Copy the connection information CKPool provides.
- Back on your dashboard, paste it into the Stratum Host field.
- Make sure the correct port number is entered.
- In the Username field, paste in the Bitcoin address you saved earlier.
- Optionally, add a period and a name for your miner at the end (like
.nerdqaxe) — this helps you identify the machine. - The password can be anything, like 123 — it’s not important.
Now, if you hit that jackpot, CKPool knows exactly where to pay you, because your Bitcoin address is right there in the username field.
Setting Up Pool Mining
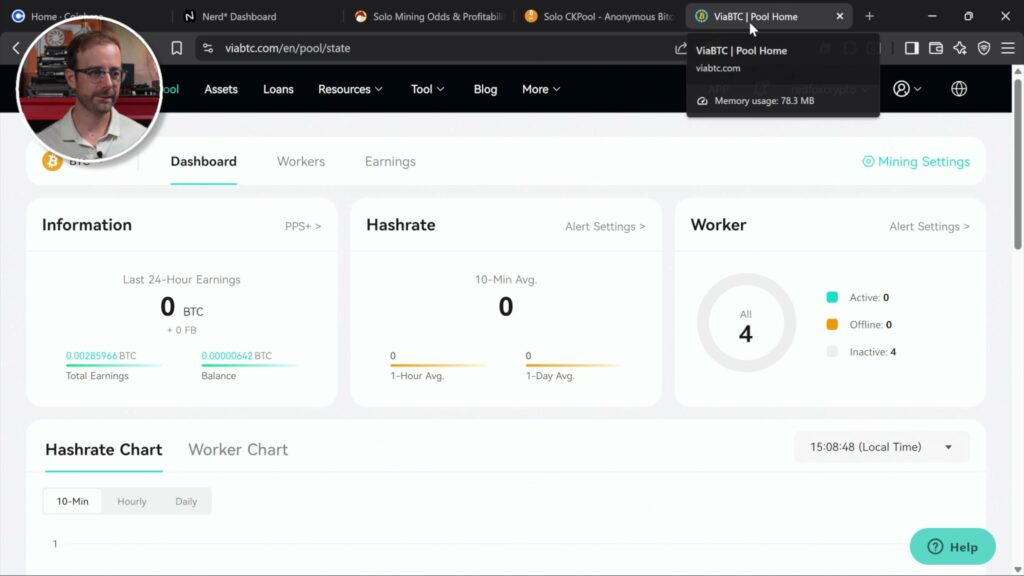
If you want consistent revenue instead, use a pool like ViaBTC. They pool a bunch of miners together, go after the jackpot, and split the rewards automatically.
- Sign up for a ViaBTC account.
- Scroll down and grab the connection information they provide.
- Paste the Stratum Host into your dashboard (the port number is usually already there).
- In the Username field, use your ViaBTC username (not your Bitcoin address).
- Enter your Bitcoin address inside your ViaBTC dashboard, where they handle payouts.
Either way, pick one — solo or pool. After a few minutes, your miner will connect. In my case, the NerdQAxe++ connected over to CKPool, which means it’s connected to the Bitcoin network and going all in trying to hit that Bitcoin jackpot. Congratulations — your miner is now mining Bitcoin.
Watch the Full Video Guide
If you’d rather see every step happen in real time — from unboxing to connecting to the network — watch the full video guide below. And if it helps you get started, hit subscribe so you don’t miss the next one.
Frequently Asked Questions
Do I need a powerful computer to mine Bitcoin?
No. You don’t need an expensive gaming PC or any special computer at all. A purpose-built Bitcoin mining machine like the NerdQAxe++ does all the work. You just need electricity and an internet connection to get going.
What’s the difference between solo mining and pool mining?
Solo mining means you try to win the entire block reward (about $200,000) for yourself, but the odds are tiny — around 3,037 years on average for a small home miner. Pool mining combines your machine with many others so you win more often and receive small, consistent payouts, such as roughly 18 cents in Bitcoin per day for this miner.
Do I need a Bitcoin wallet before I start mining?
Yes. You need a Bitcoin wallet address so your mining rewards have somewhere to be paid. You can get one quickly by signing up on Coinbase, or hold your own keys with a hardware wallet like a Tangem for more security and control.
Should I use Coinbase or a hardware wallet?
If you’re just getting started, Coinbase is the simplest option and easy to set up. But with Coinbase, you’re trusting them to hold the key to your Bitcoin. If you plan to stick around and accumulate a good amount, a hardware wallet lets you hold that key yourself so you don’t have to trust anyone.
How do I find my miner’s IP address to set it up?
After your miner powers on and joins your Wi-Fi network, the IP address appears right at the top of its display screen. Type that address into a browser on your computer or phone to open the miner’s dashboard, then head to Settings to configure your pool.
More Bitcoin Mining Guides
- Mining Bitcoin with an ASIC
- How Much Bitcoin in 1 Month of Mining with this ASIC?
- Why Most People Can’t Run ASIC Miners at Home
- This Mystery Crypto Miner Is Outperforming Everything
Is Bitcoin Mining for Beginners Worth It?
If you are just getting into Bitcoin mining for beginners, the best next step is to pick a small miner and follow a setup guide. Here are a few to get you started: